Push的证书配置
证书配置是为了保证用户下载的是正版的APP,Push证书是为了保证Provider是对应自己APP的才有权限推送。 为了便于理解,从零开始演示配置的信息,网页打开开发者首页https://developer.apple.com,–》Account, --》 Certificates, Identifiers & Profiles
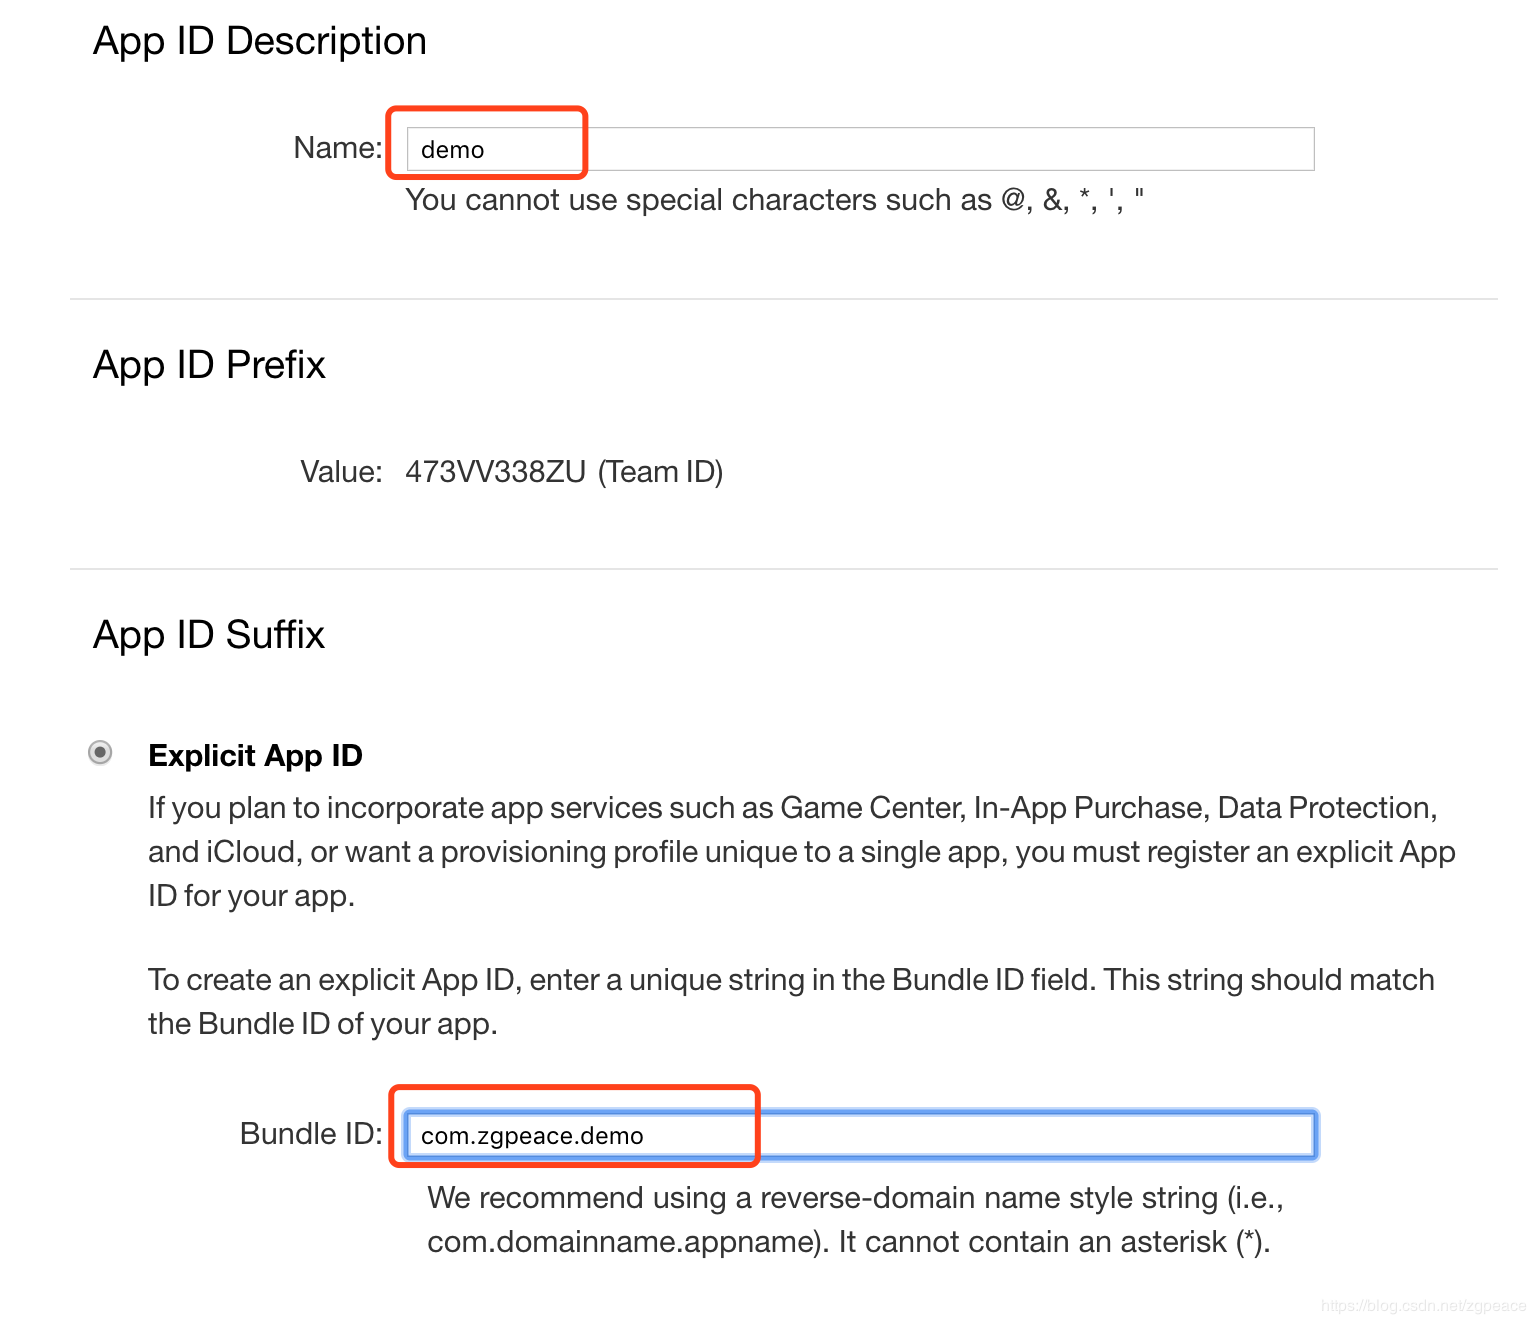
1.先配置App IDs, 新建
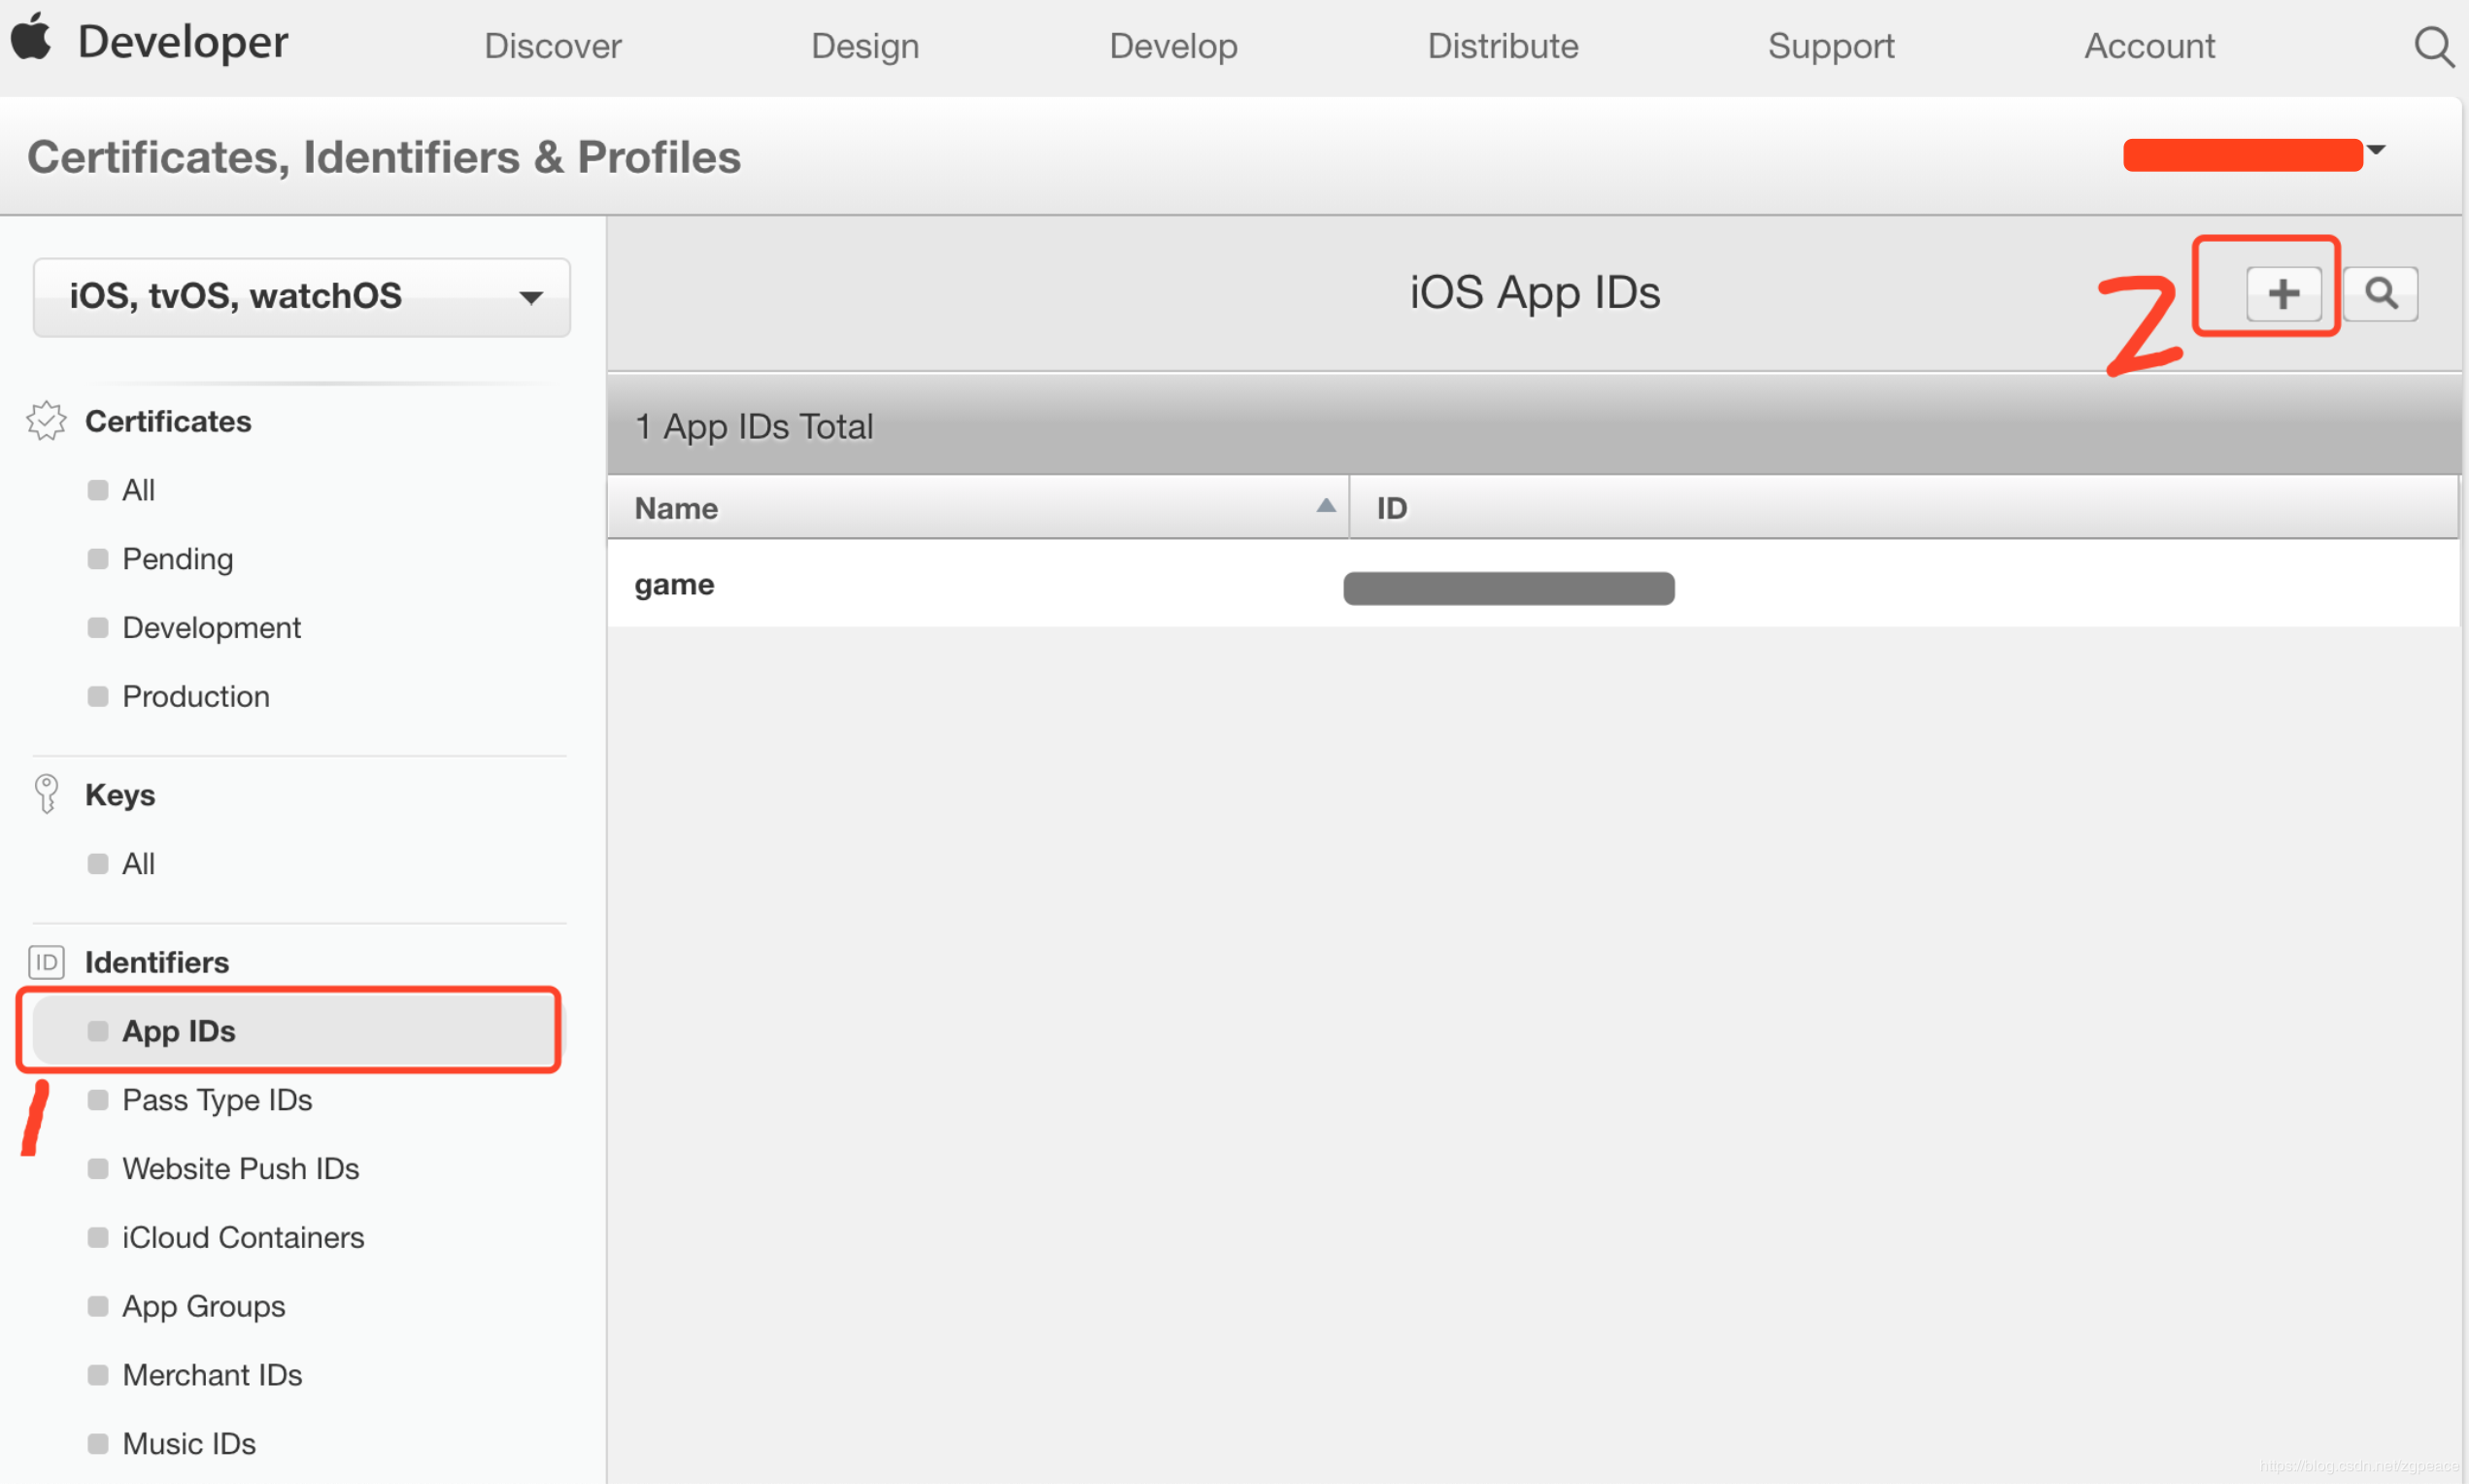
2.推送不能用通配符,点击最下面的Continue按钮,下一页点击最下面Register按钮,下一页点击最下面的Done按钮。
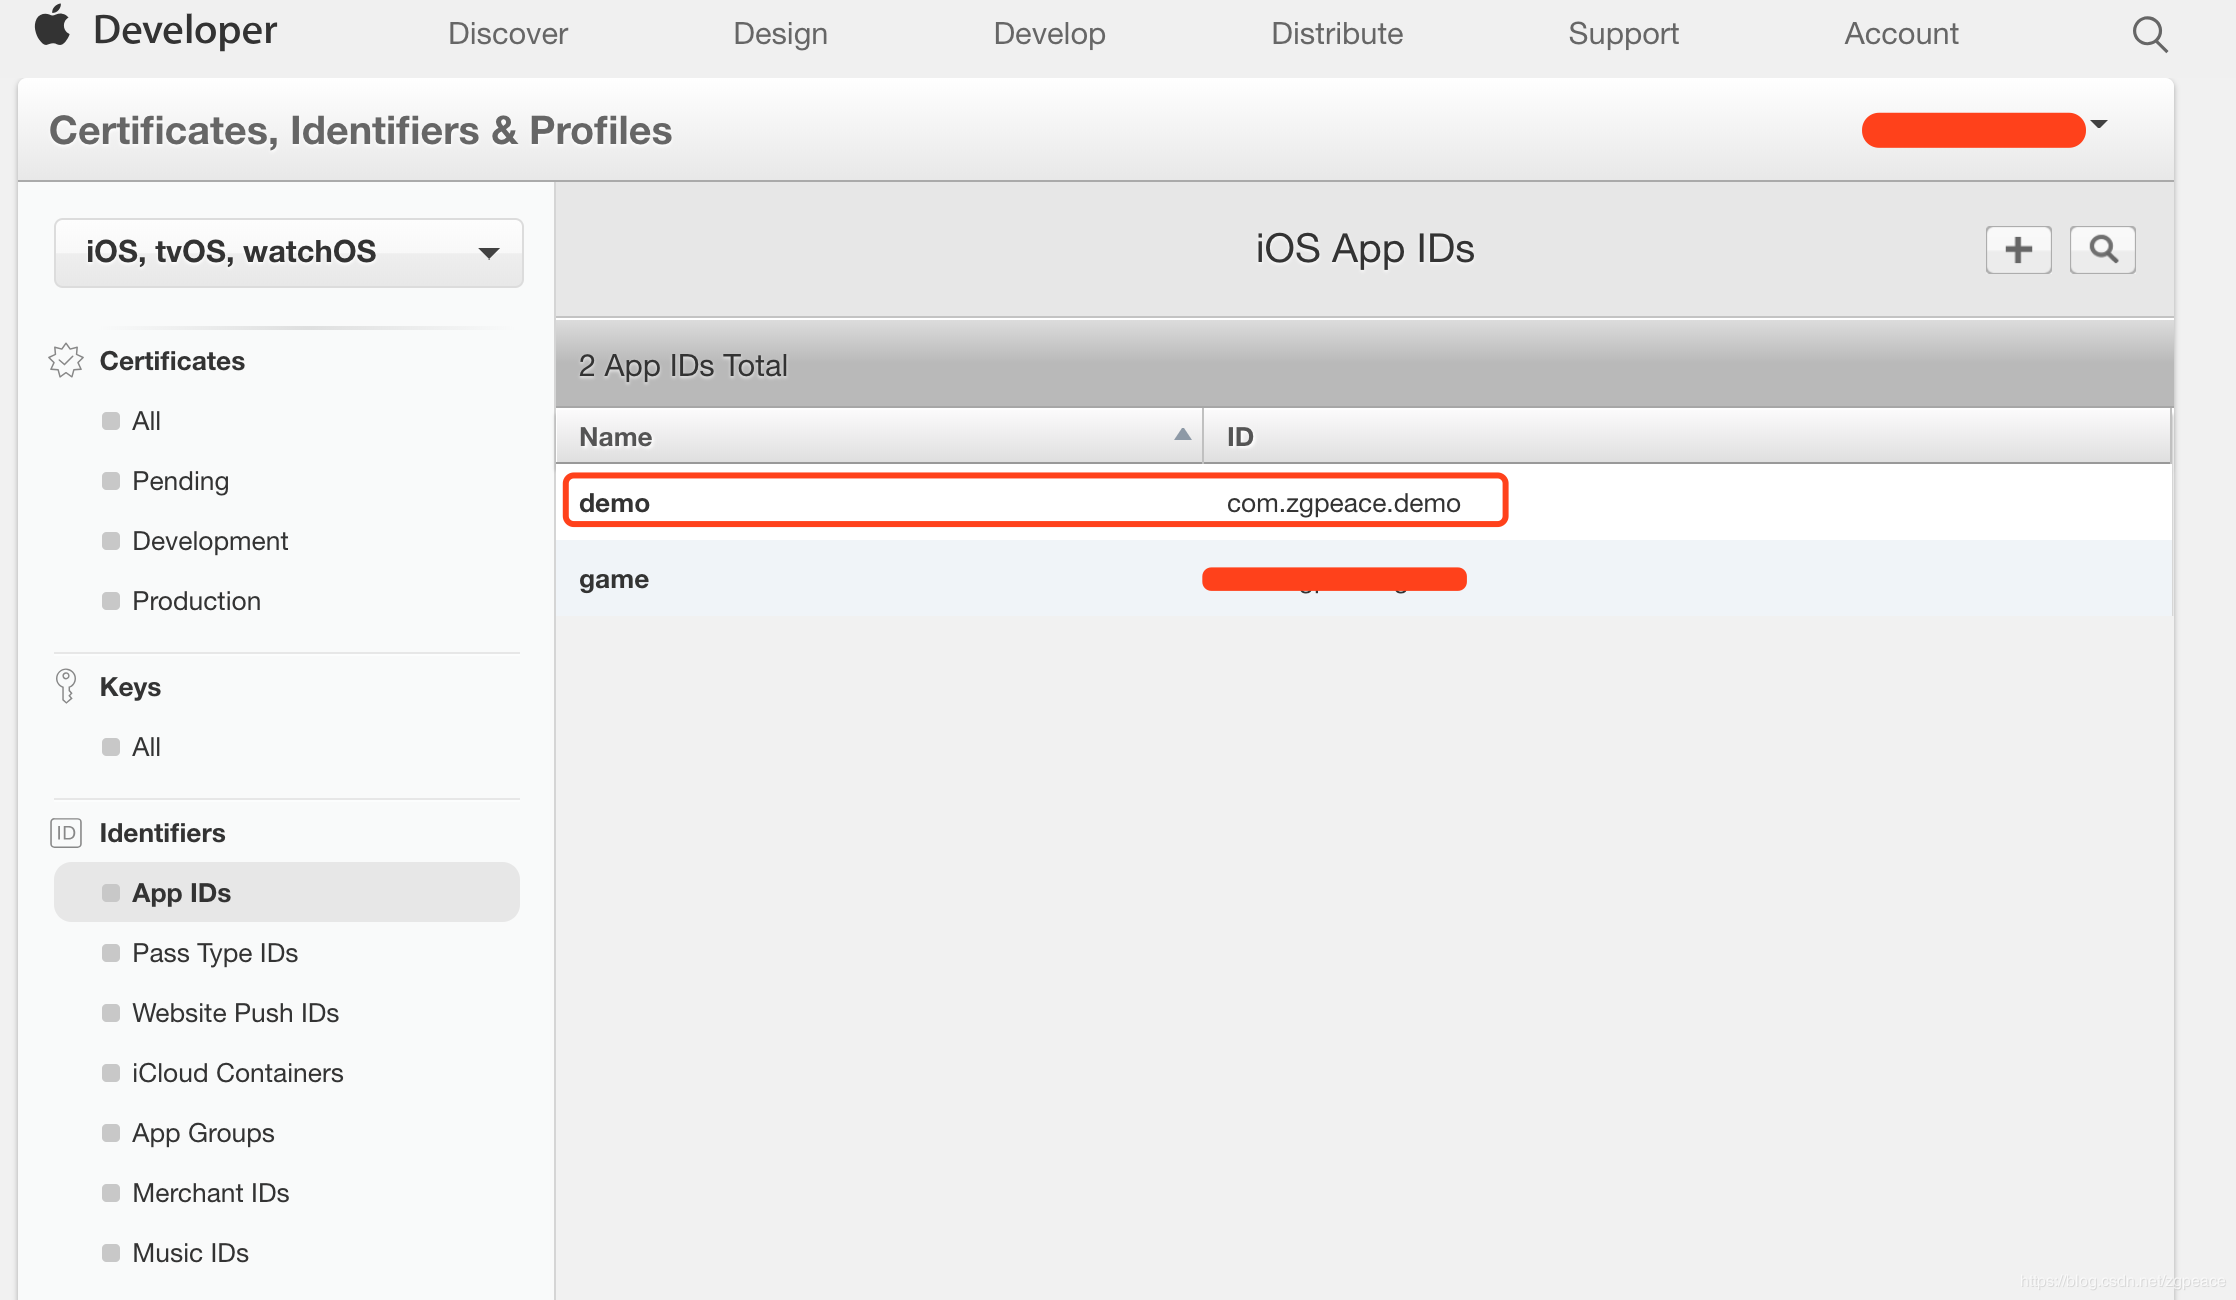
3.点击Certificates, IDs & Profiles -> Identifiers -> App IDs 选择刚刚建立的id --> com.zgpeace.demo,
4.你可以看到服务列表Application Services available, 其中 Push Notifications显示的是可配置的configurable:

5.点击最下面的Edit按钮,找到Push Notification,左边打勾。
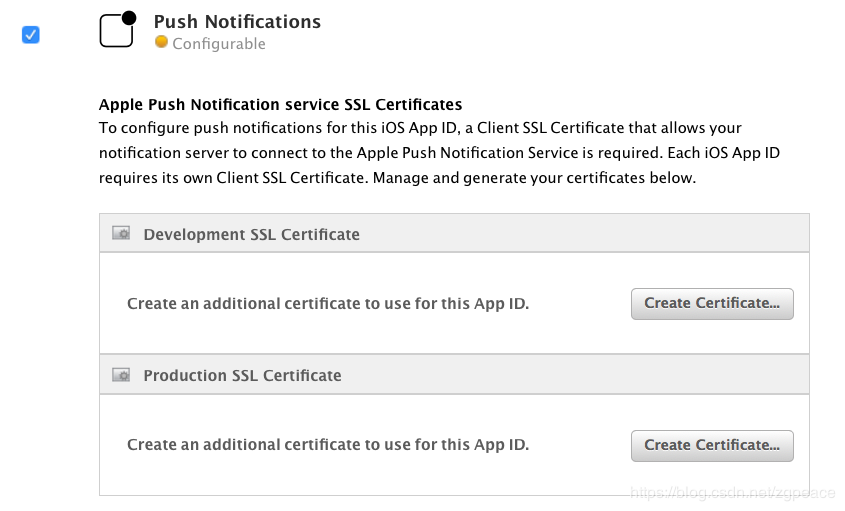
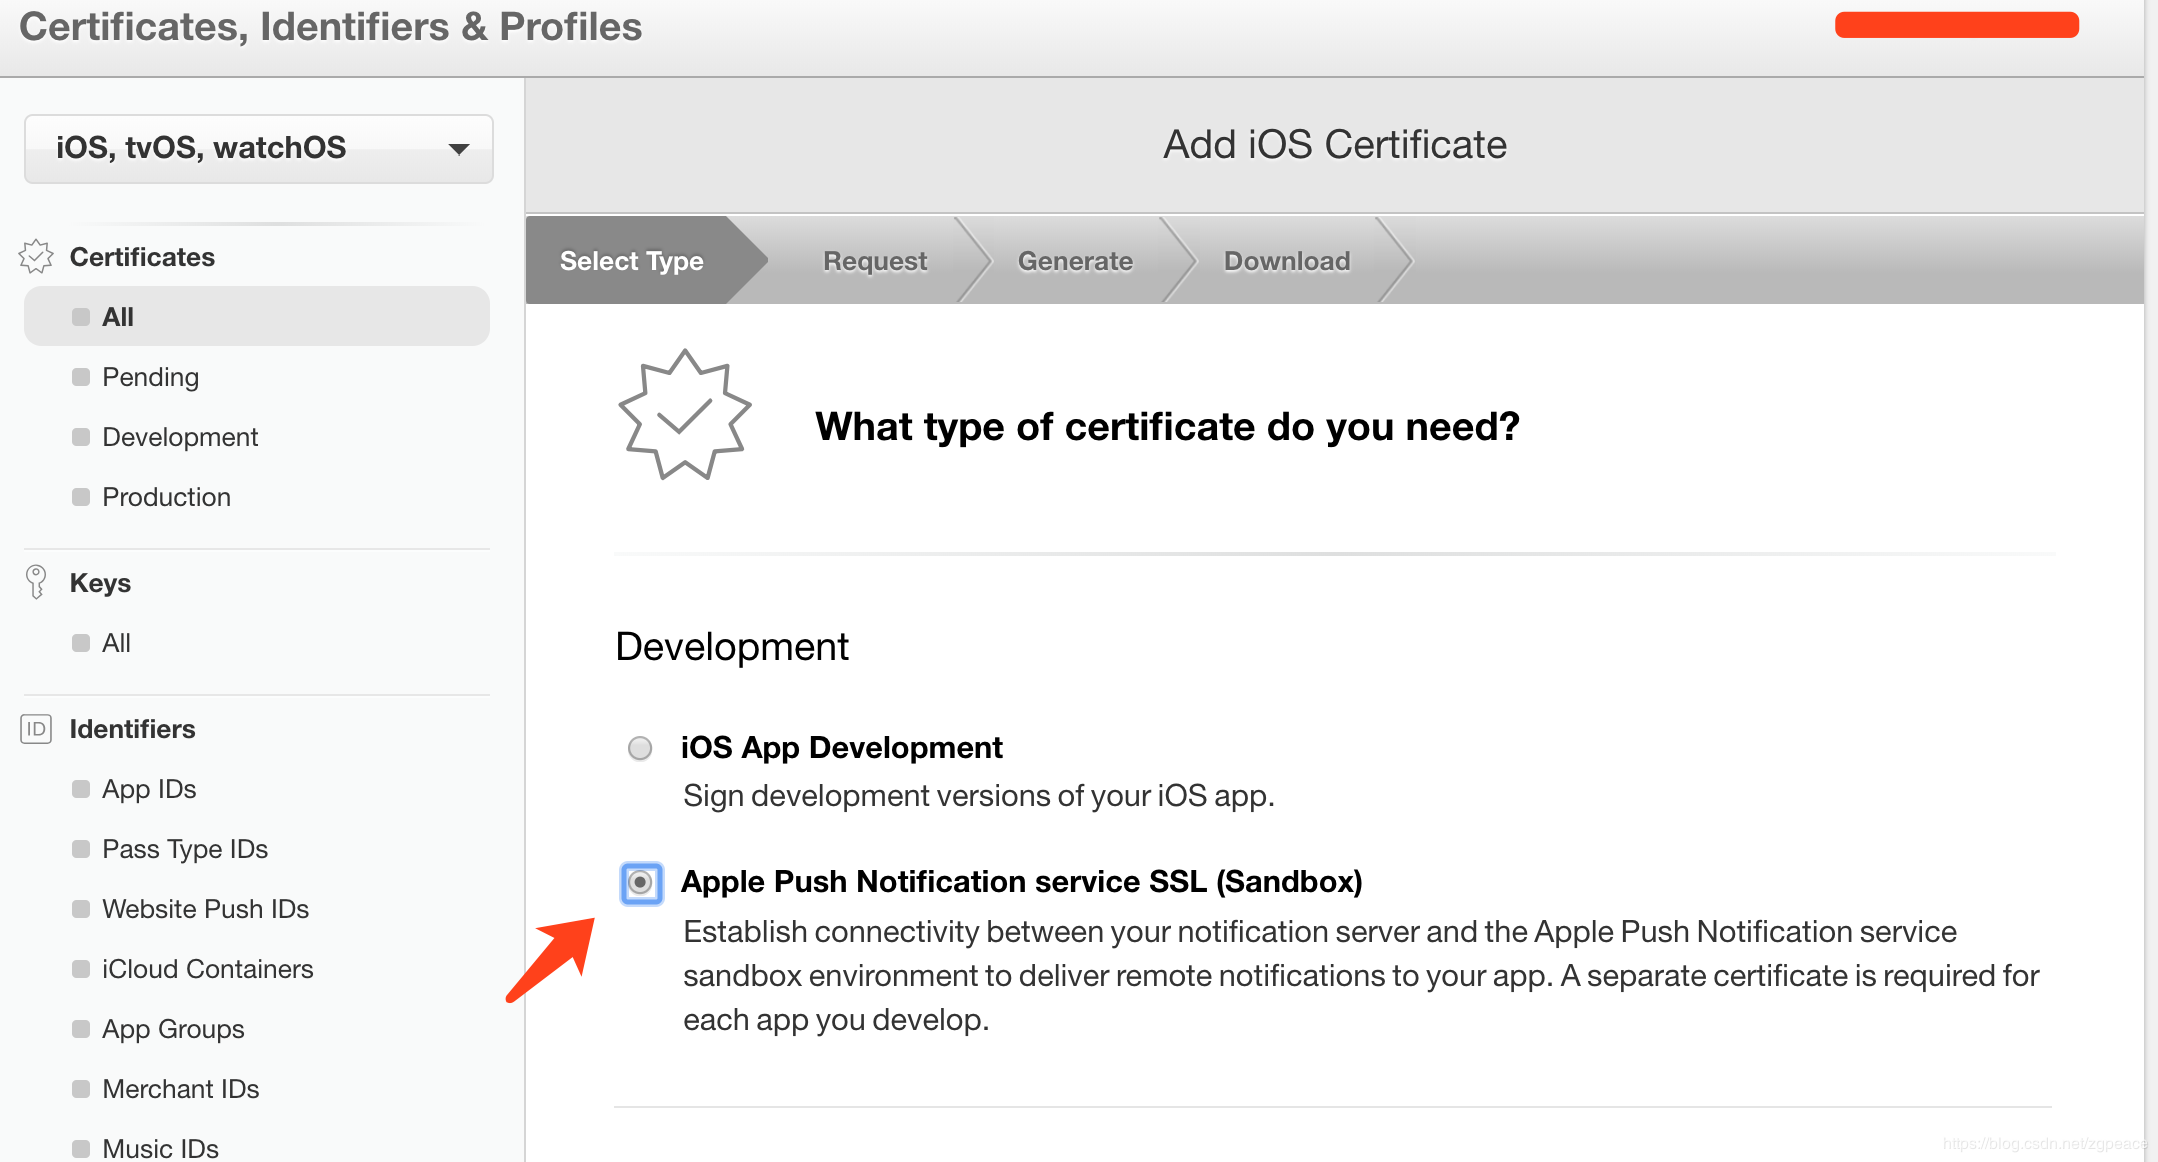
6.这里创建Development SSL Certificate --》 点击Create Certificate. (Production SSL Certificate的创建是类似的). --》 打勾 Apple Push Notification service SSL(Sandbox) --> 点击Continue
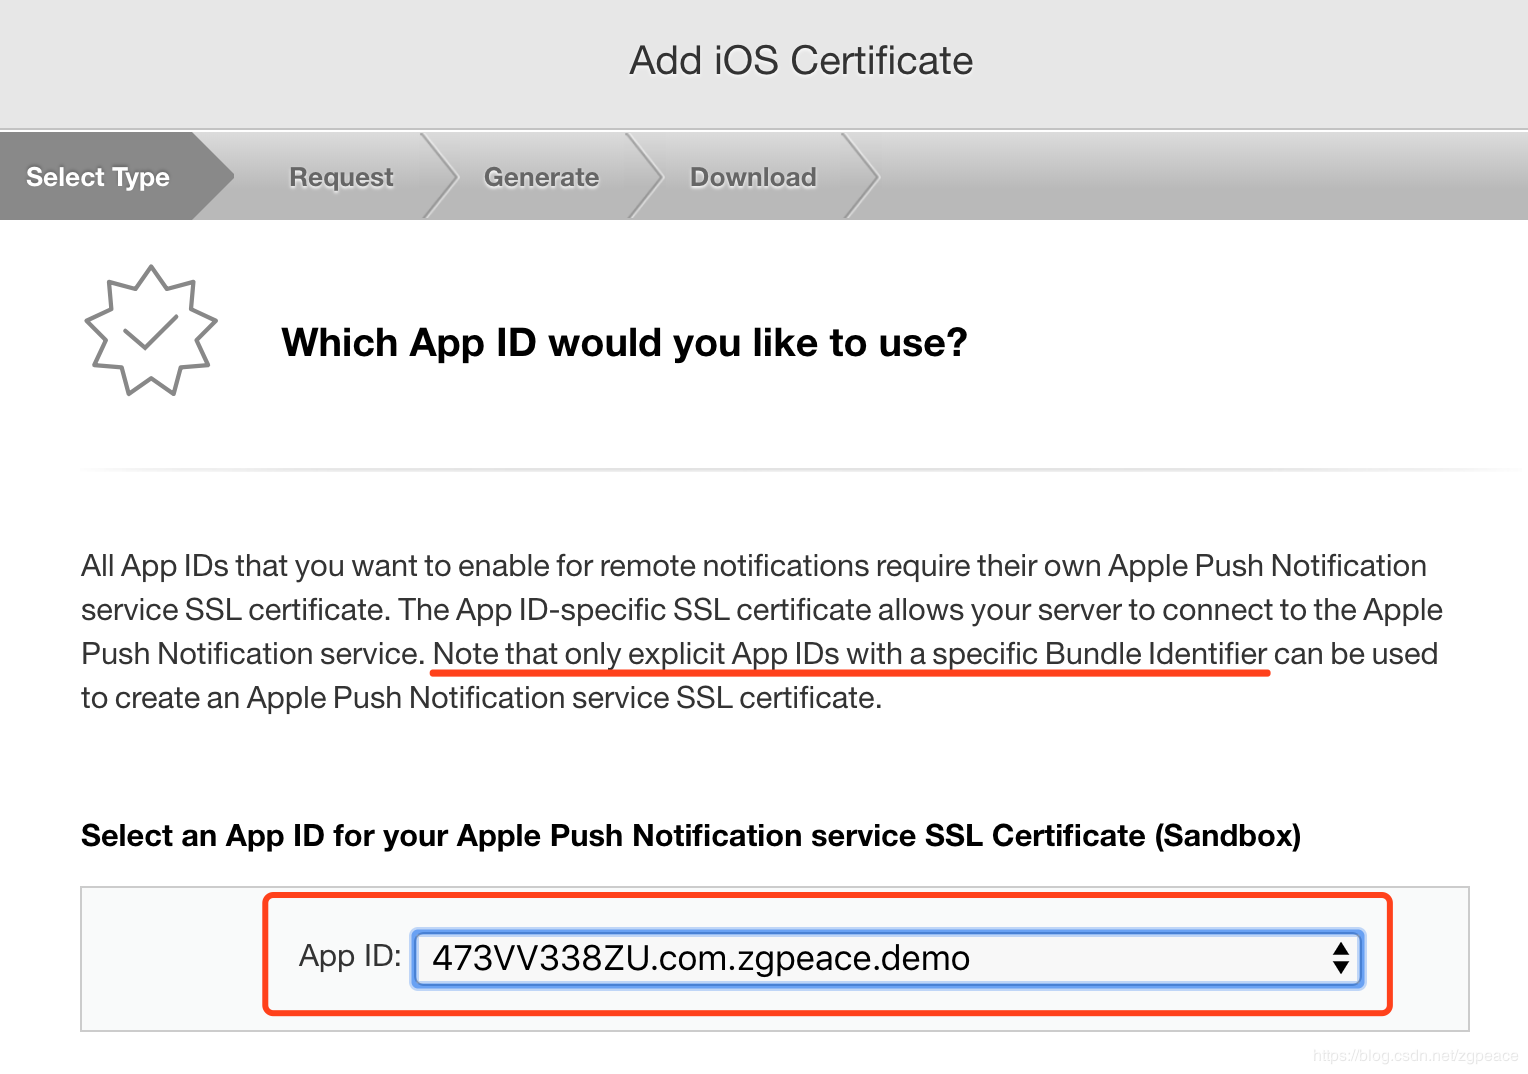
7.选择创建的App ID com.zgpeace.demo, 点击Continue。这里会明确说明,不能用通配符的App ID才能创建Apple Push Notification service SSL certificate.
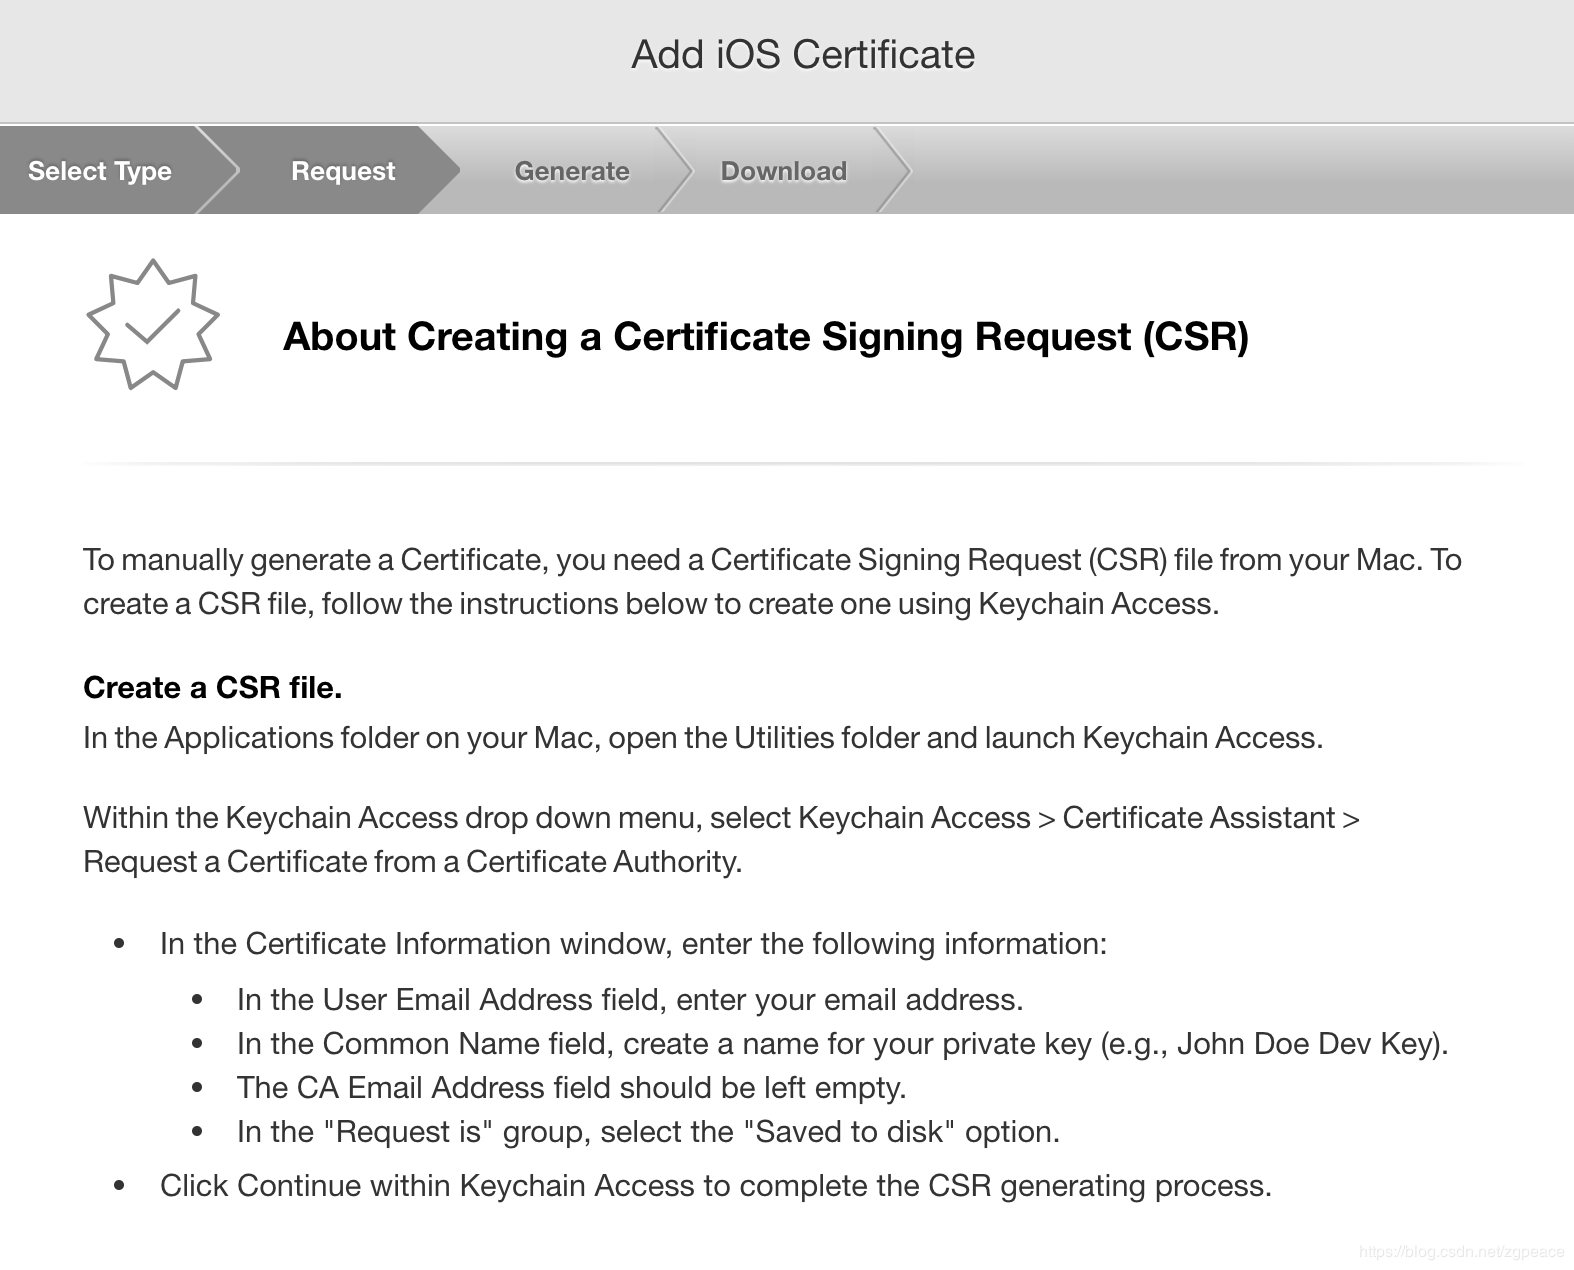
8.创建Certificate Signing Request(CSR). 这个界面是显示如何创建CSR的步骤。下面会一步一步创建CSR,这个时候要开小差了,不着急点Continue哦。(下面以8.?表示分步骤,待到9.才是点Continue下来的。)
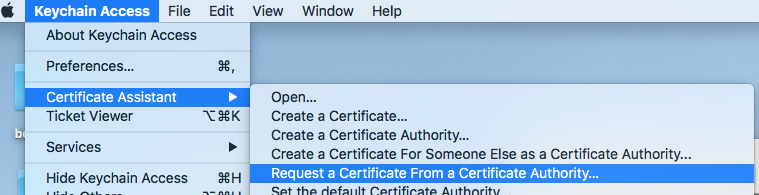
8.1.打开Keychain Access软件,路径为 Application folder --> Utilities folder --> 打开 Keychain Access. 或者用快键键CMD + Space打开Spotlight,输入Keychain Access。
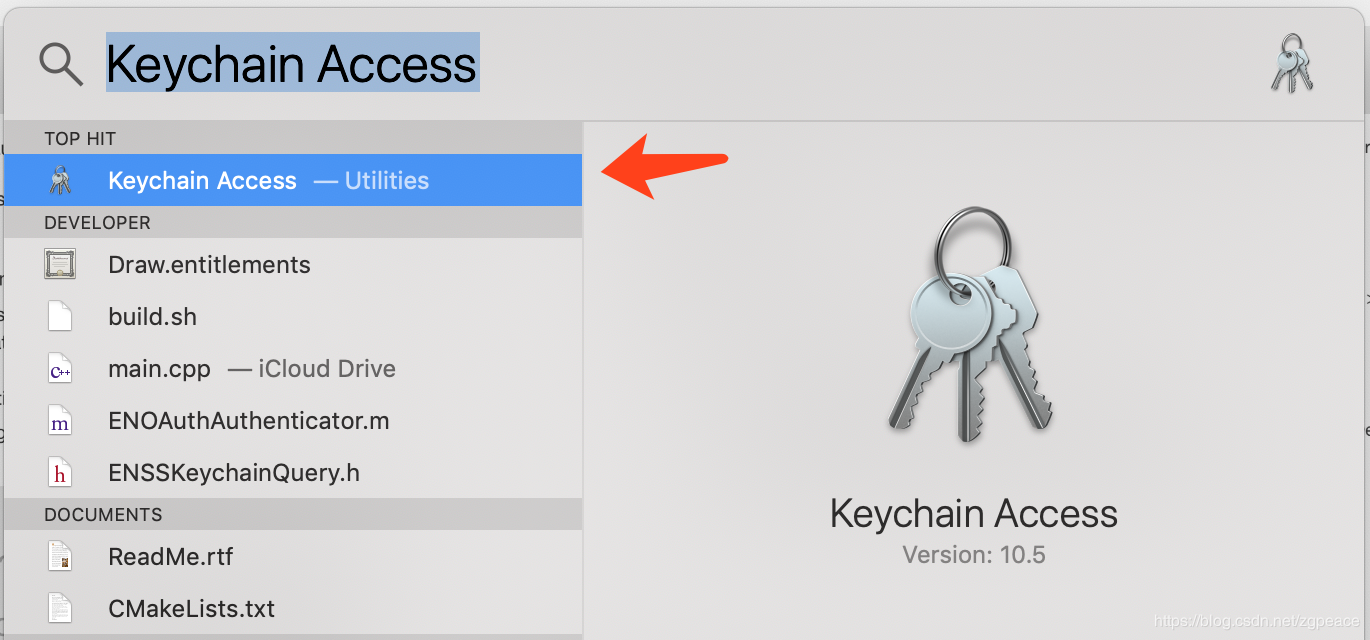
8.2.点击Keychain左上角的下拉按钮, 选择 Keychain Access > Certificate Assistant > Request a Certificate from a Certificate Authority.
注意:Category 一定要选择Certificates,否则出各种诡异的错误。

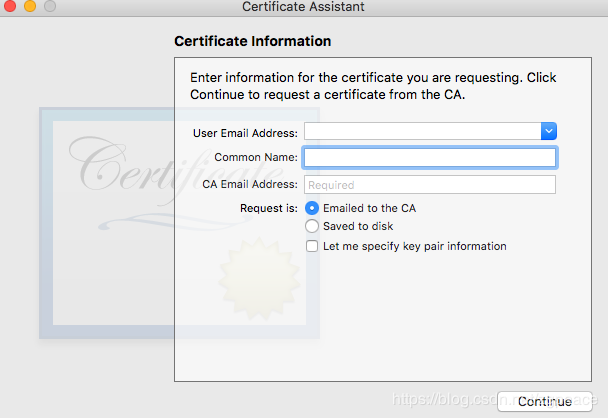
8.3. 在Certificate Information窗口, 填写下面的信息:
User Email Address field填写你的邮箱.
Common Name field填写一个私钥的名字 (e.g., John Doe Dev Key).
CA Email Address field要留空.
“Request is” 分组, 选择"Saved to disk" .
点击Continue,完成CSR生成, 保存到本地,这个马上要用,保存到可以找到的地方.
9.点击8的Continue,选择8.3生成CSR文件,点击Continue
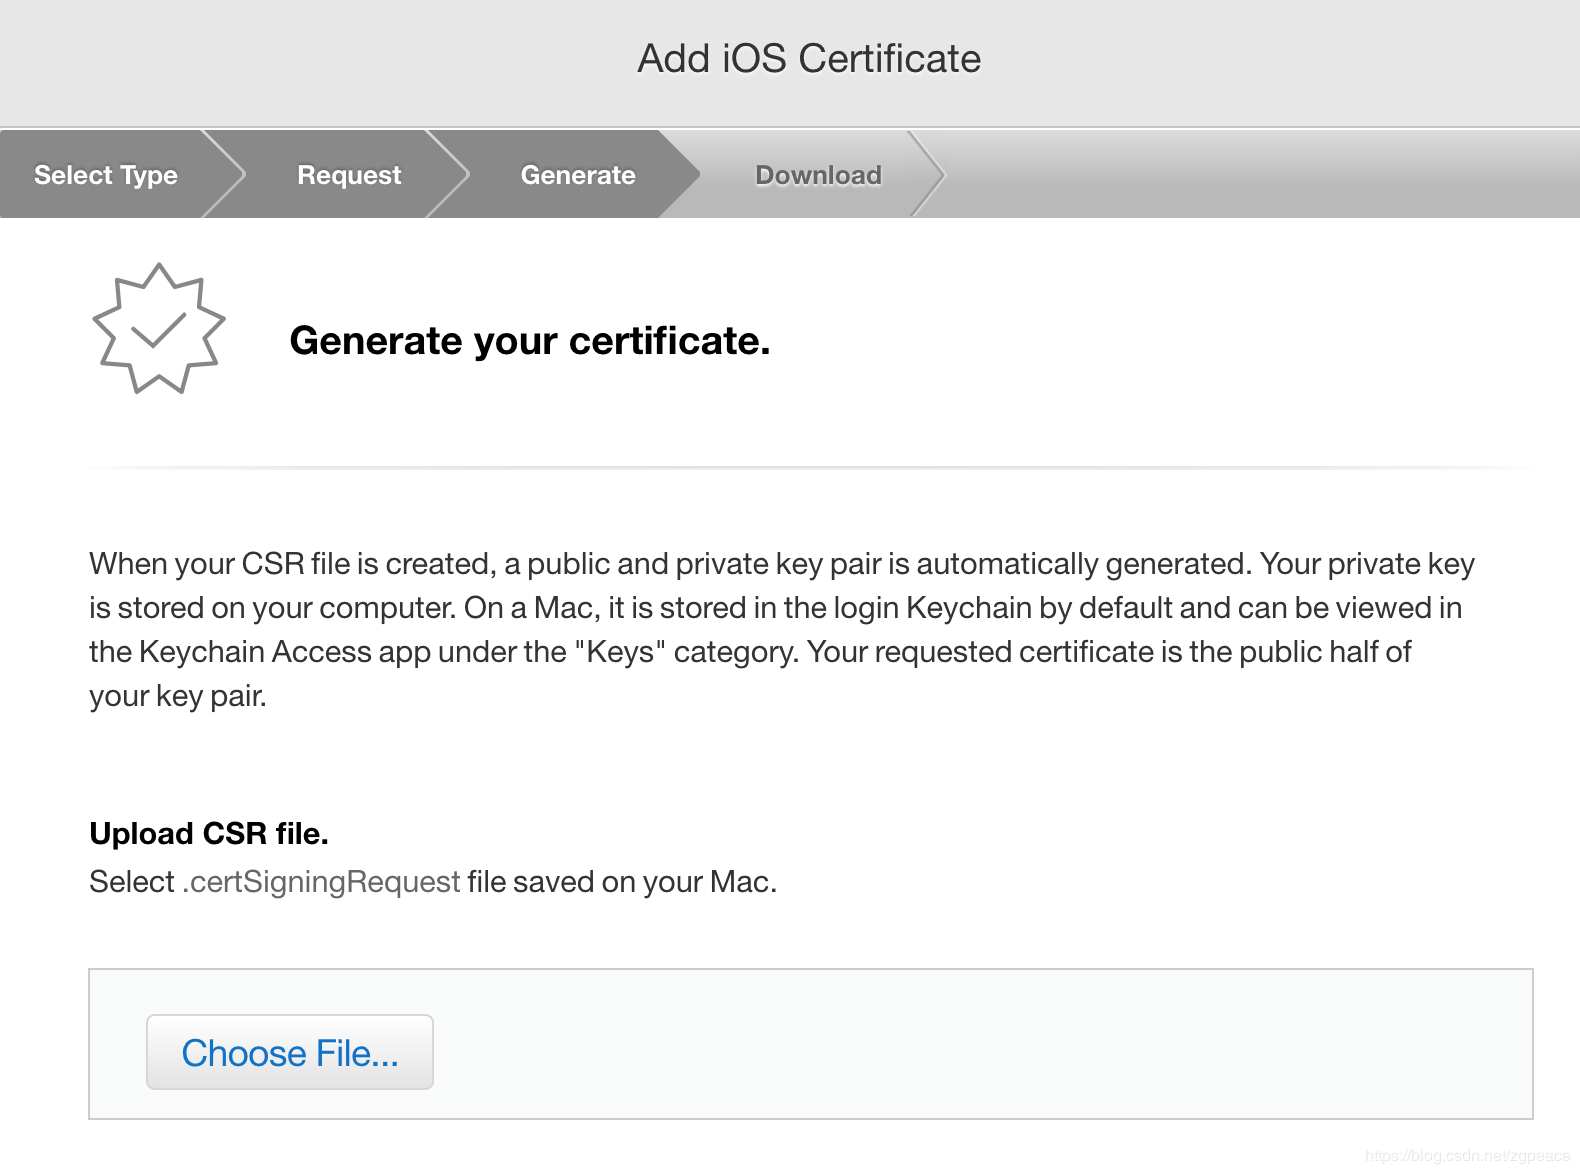
10.如果一切顺利,将会得到证书页面。下载证书,安装。

11.安装成功以后,可以在Keychain Access找到证书信息。

12.恭喜你!这个步骤很长,但是值得。查看App ID的Development证书状态,已经变为Enabled,路径为 Certificates, IDs & Profiles -> Identifiers -> App IDs Push Notifications :

13.上面生成的证书是给Provider Server用的。 因为是新创建的App ID, project需要运行的话,需要先建立客户端的Development证书(CSR可以用之前的),接在在设备里面加入iPhone的DeviceId,证书跟DeviceId一起创建Profile。
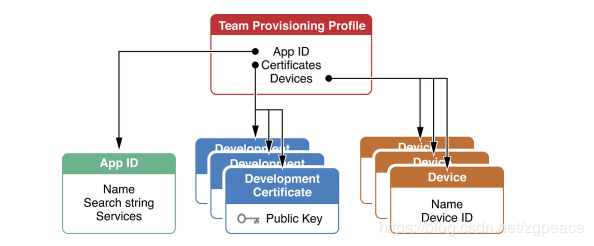
证书实际上是包含公钥跟私钥,加密以及身份验证用的;Device Id表明哪些设备可以用于调试; Profile表示档案,最终打包上传App Store,Apple根据这些信息校验App是否是正版.
Development Certificate 创建结果图, 下载并安装证书 :

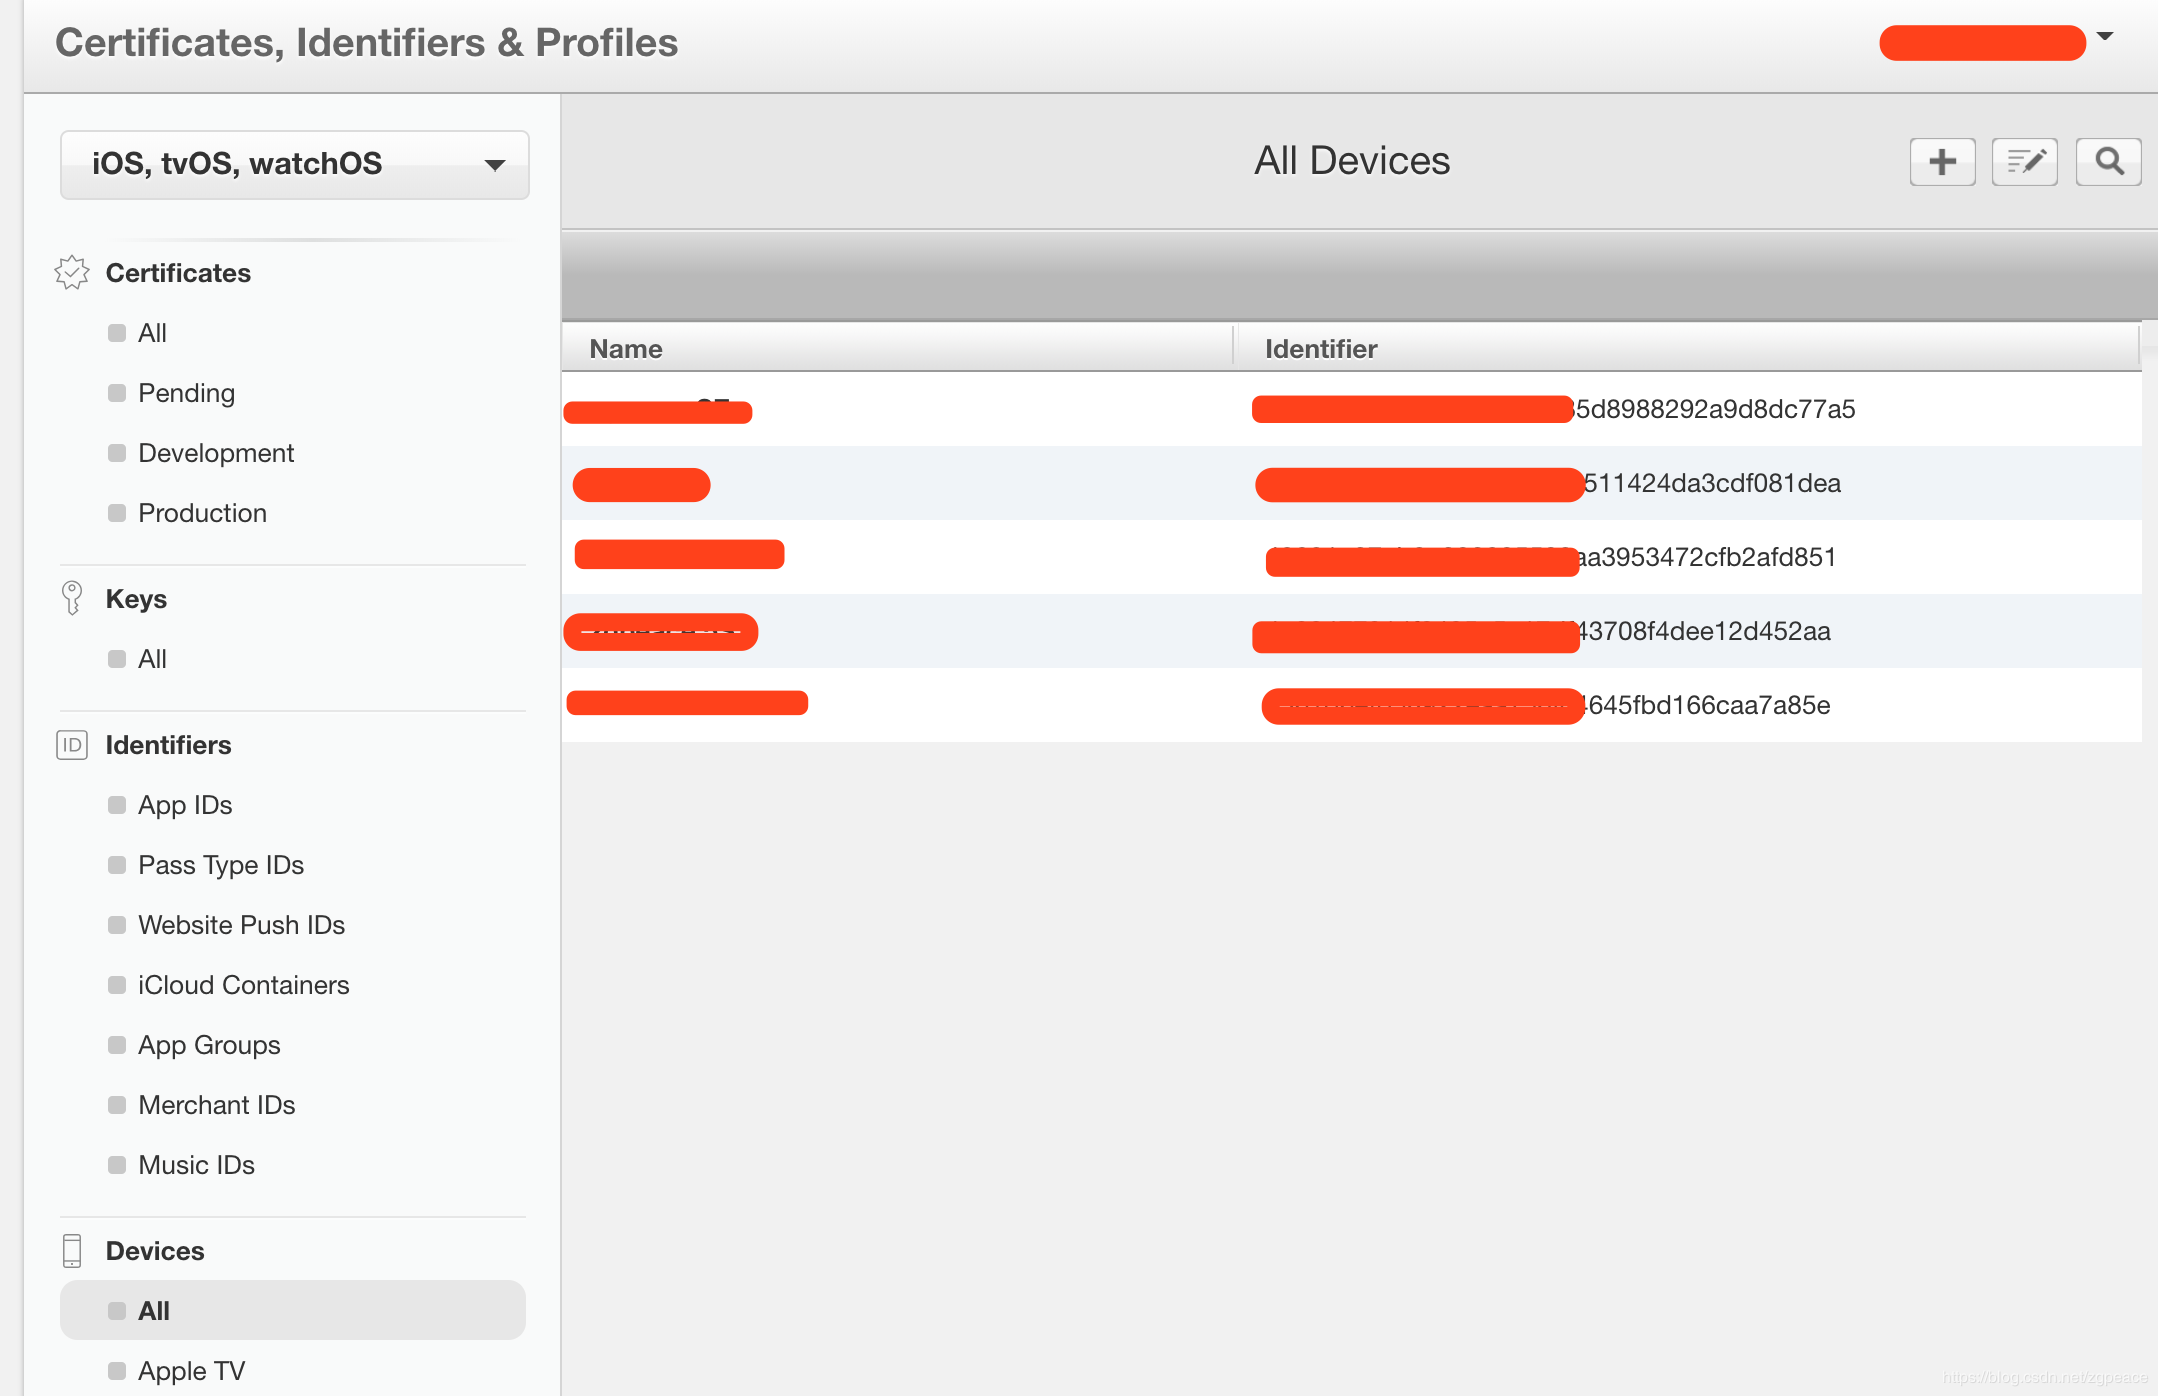
Device Id添加结果图:
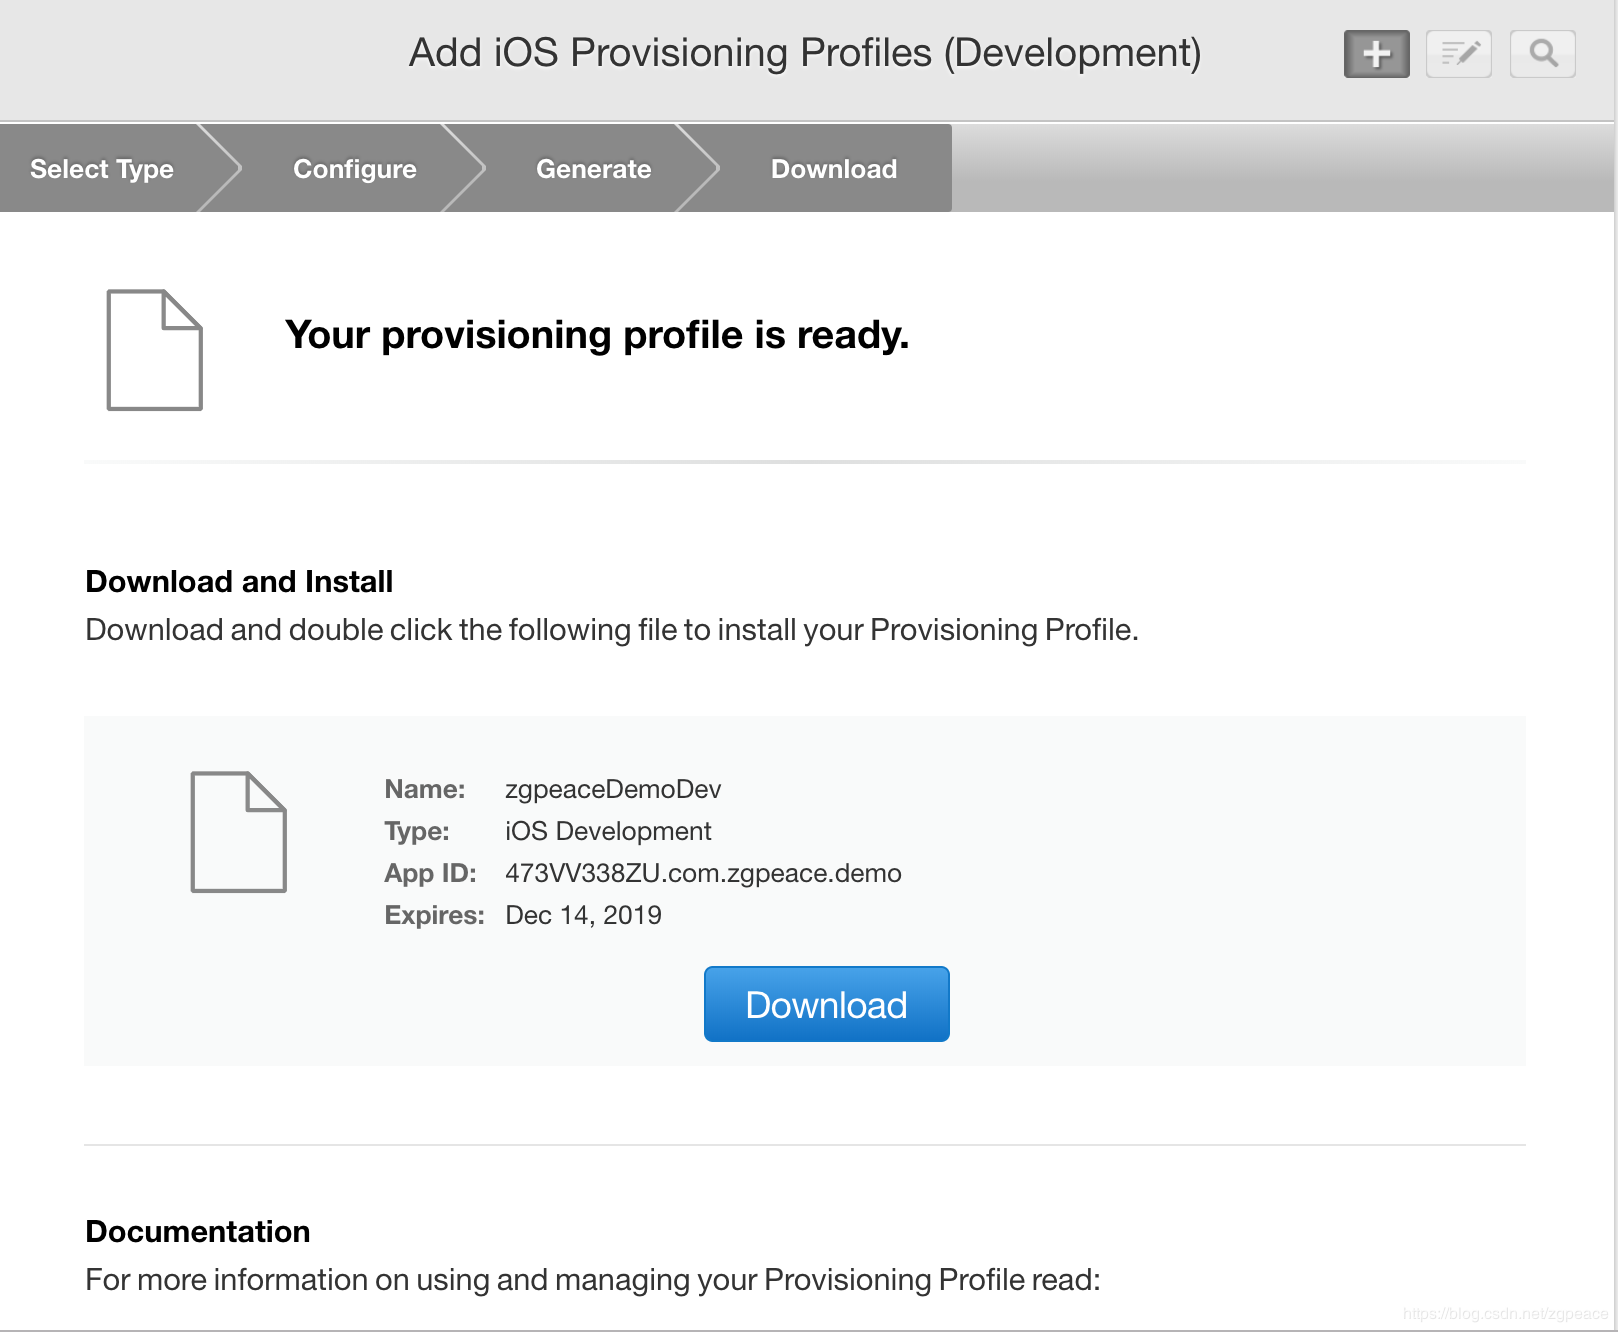
Profile生成后,点击下载,双机安装,就装到XCode里面去了。

Push的project配置
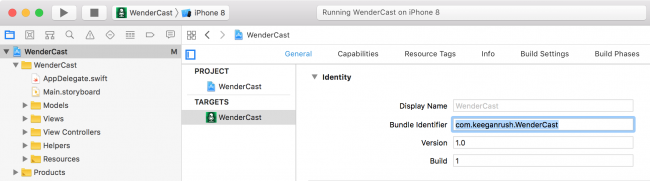
修改Bundle Identifier为新建com.zgpeace.demo, WenderCast target > General > change Bundle Identifier
开启Push Notification, WenderCast target > the Capabilities tab > Push Notifications 选择ON:

Push的权限
iPhone的体验很好,做任何事情都要经过用户同意才能处理。 推送也一样,第一步先征得用户是否需要推送这个功能。
1.打开文件 AppDelegate.swift 在文件的最上面加上:
import UserNotifications
2.加下面的方法在 AppDelegate的最下面:
func registerForPushNotifications() {
  UNUserNotificationCenter.current() // 1
    .requestAuthorization(options: [.alert, .sound, .badge]) { // 2
      granted, error in
      print("Permission granted: \(granted)") // 3
  }
}
分析上面代码:
1.UNUserNotificationCenter 处理了APP所有推送相关的事件.
2.requestAuthorization(options:completionHandler:) 请求授权用推送的权限. options 表示推送可以展示的情况 – 例子里设置了 alert, sound and badge.
3.授权结果通过Bool得知.
注解: options 参数 requestAuthorization(options:completionHandler:) 可以是下面的任何组合 UNAuthorizationOptions:
.badge: 显示推送书在 app’s icon.
.sound: 播放声音.
.alert: 显示文字.
.carPlay: 显示推送在车载系统.
.provisional: 发布不会被拒绝的推送. 比如静默推送.
.providesAppNotificationSettings: 表示App有自己的推送设置UI.
.criticalAlert: 忽略静音,并且不会被打断。你需要向Apple申请者特殊的权利, 并说明这是必要的. .
3.在方法application(_:didFinishLaunchingWithOptions:)的末尾,在 return之前加入以下代码:
registerForPushNotifications()
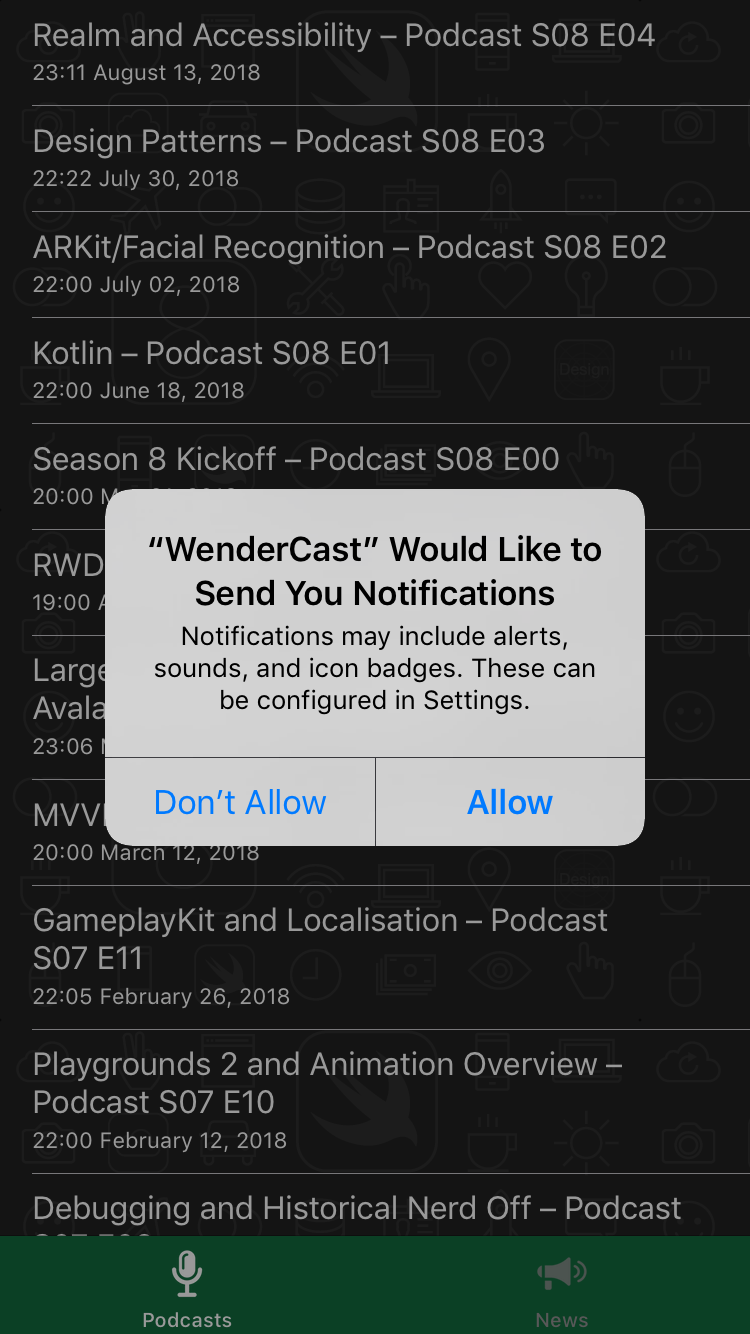
构建 > 运行。当APP运行起来后,弹框问用户是否允许发推送。
4.用户点击允许,App可以显示推送了。真棒!但是,要是用户拒绝了呢?加下面的方法在 AppDelegate:
 func getNotificationSettings() {
   UNUserNotificationCenter.current().getNotificationSettings { settings in
     print("Notification settings: \(settings)")
   }
}
5.在 registerForPushNotifications, 用下面替换掉方法 requestAuthorization(options:completionHandler:) :
UNUserNotificationCenter.current()
  .requestAuthorization(options: [.alert, .sound, .badge]) {
    [weak self] granted, error in
    print("Permission granted: \(granted)")
    guard granted else { return }
    self?.getNotificationSettings()
}
Push的token获取
用户授权成功后,接下来获取Push的token,需要发送给Provider Server,存入数据库。
1.在getNotificationSettings(), 在closure的里面print的下面,加以下代码:
guard settings.authorizationStatus == .authorized else { return }
DispatchQueue.main.async {
  UIApplication.shared.registerForRemoteNotifications()
}
2.获取token成功print出来,后面会用到。出错,打印出错信息。 以下方法为成功、失败的delegate。
func application(
  _ application: UIApplication,
  didRegisterForRemoteNotificationsWithDeviceToken deviceToken: Data
) {
  let tokenParts = deviceToken.map { data in String(format: "%02.2hhx", data) }
  let token = tokenParts.joined()
  print("Device Token: \(token)")
}


func application(
  _ application: UIApplication,
  didFailToRegisterForRemoteNotificationsWithError error: Error) {
  print("Failed to register: \(error)")
}
token例子:

Push Server的配置
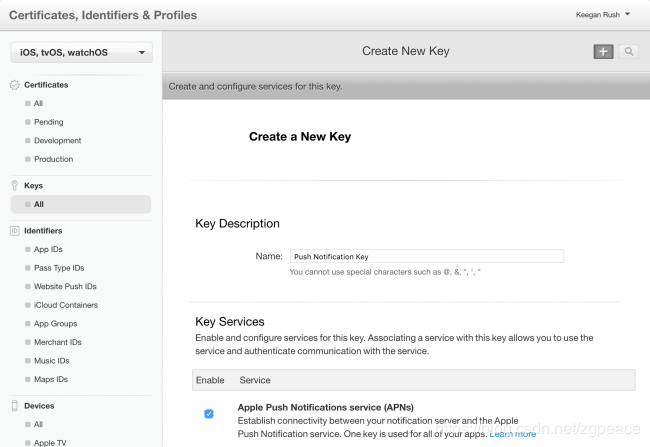
1.创建Authentication Key,你只要创建一个key,你所用应用都可以用。 网页打开开发者首页https://developer.apple.com,–》Account, --》 Certificates, Identifiers & Profiles --》Keys ▸ All。在右上角, 点击 加号+按钮 .
取个名字, 比如 Push Notification Key. 在 Key Services 下面, 勾选 Apple Push Notifications service (APNs).
点击 Continue ,接着 Confirm 在下个页面,点击下载. 文件名字类似于 AuthKey_4SVKWF966R.p8. 保存好该文件,你需要用它来发推送! 4SVKWF966R 文件名字的一部分是Key ID. 你也需要它.
你最后需要的是your Team ID. 点击链接跳转到Membership Details 页面,你就会找到.
接下来就可以发推送消息了。
Push Server发送payload推送
下载链接PushNotifications .
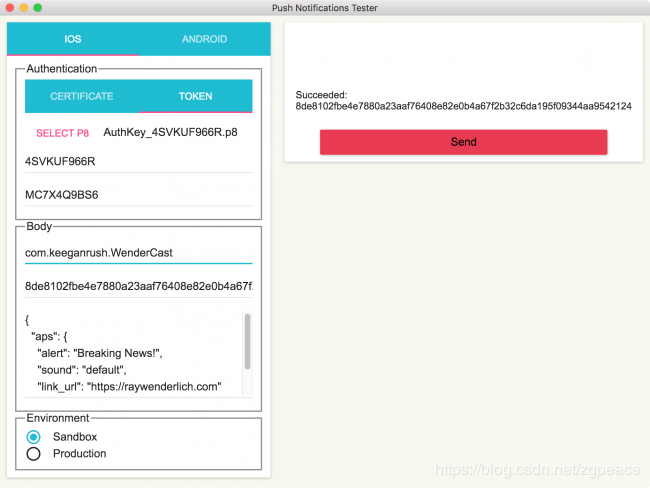
打开 PushNotifications,并配置下面的信息:
1.在 Authentication下面, 选择 Token.
2.点击按钮 Select P8 ,选择 文件 ** .p8** 在前面的有讲解.
3.输入 Key ID 和 Team ID.
4.Body下面, 输入app的 Bundle ID 和 device token.
5.把request body的内容改为如下:
 {
   "aps": {
     "alert": "Breaking News!",
     "sound": "default",
     "link_url": "https://raywenderlich.com"
   }
}
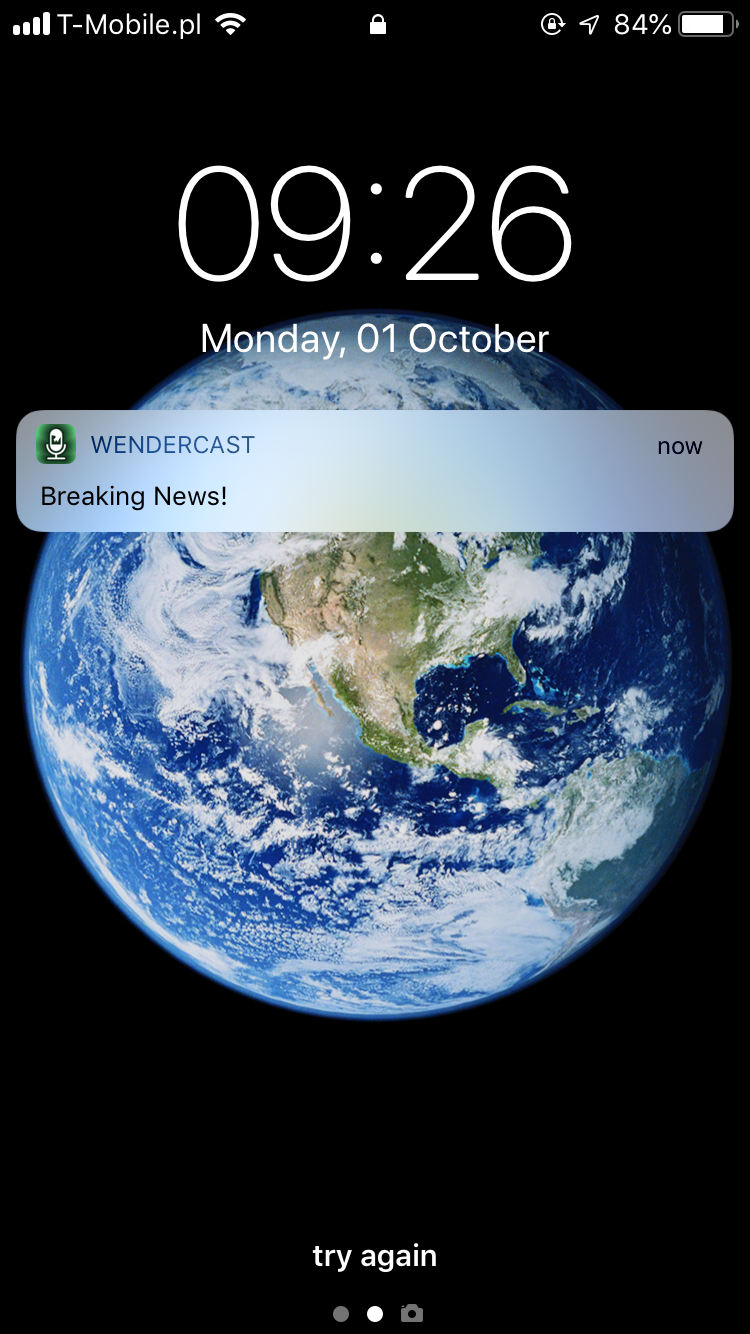
6.app退到background,或者锁屏.
7.点击按钮Send button在 PushNotifications.
你可以获取到自己的第一个推送:
注:本文从CSDN转载过来,如侵犯了您的权益,请联系立马删除